DIY Homemade Heavy Club
I swung my first homemade club last night!
I didn’t think I was in the market for a DIY project, but a forced break away from working out plays with your mind in funny ways - What else could I do with the time I’m not working out..?

Here’s the recap:
Level of difficulty: Easy to Medium. I have no background in construction, trade work, or engineering, but I’ve been a homeowner for 30 years so I’ve learned a thing or two along the way. I am probably about “average” skill level.
Cost: Inexpensive. I spent $5 on a 60-lb bag of Quickrete (which will last for several clubs), $5 on a 48-inch wood dowel (which I cut to 18-inches, so it will make 2 clubs), and $4 on a planter-pot at Walmart. Everything else was already on hand. Actual cost for this club was $4 pot + 1/2 of $5 dowell + 10% of $5 Quickrete = $7.50.
Time Involved: Short. I took less than an hour to get out all my tools and setup my area, then double and triple check everything. Mixing and filling the cement took a few minutes, then I let it dry/cure for 24 hours before cracking the mold.
Here are the details:
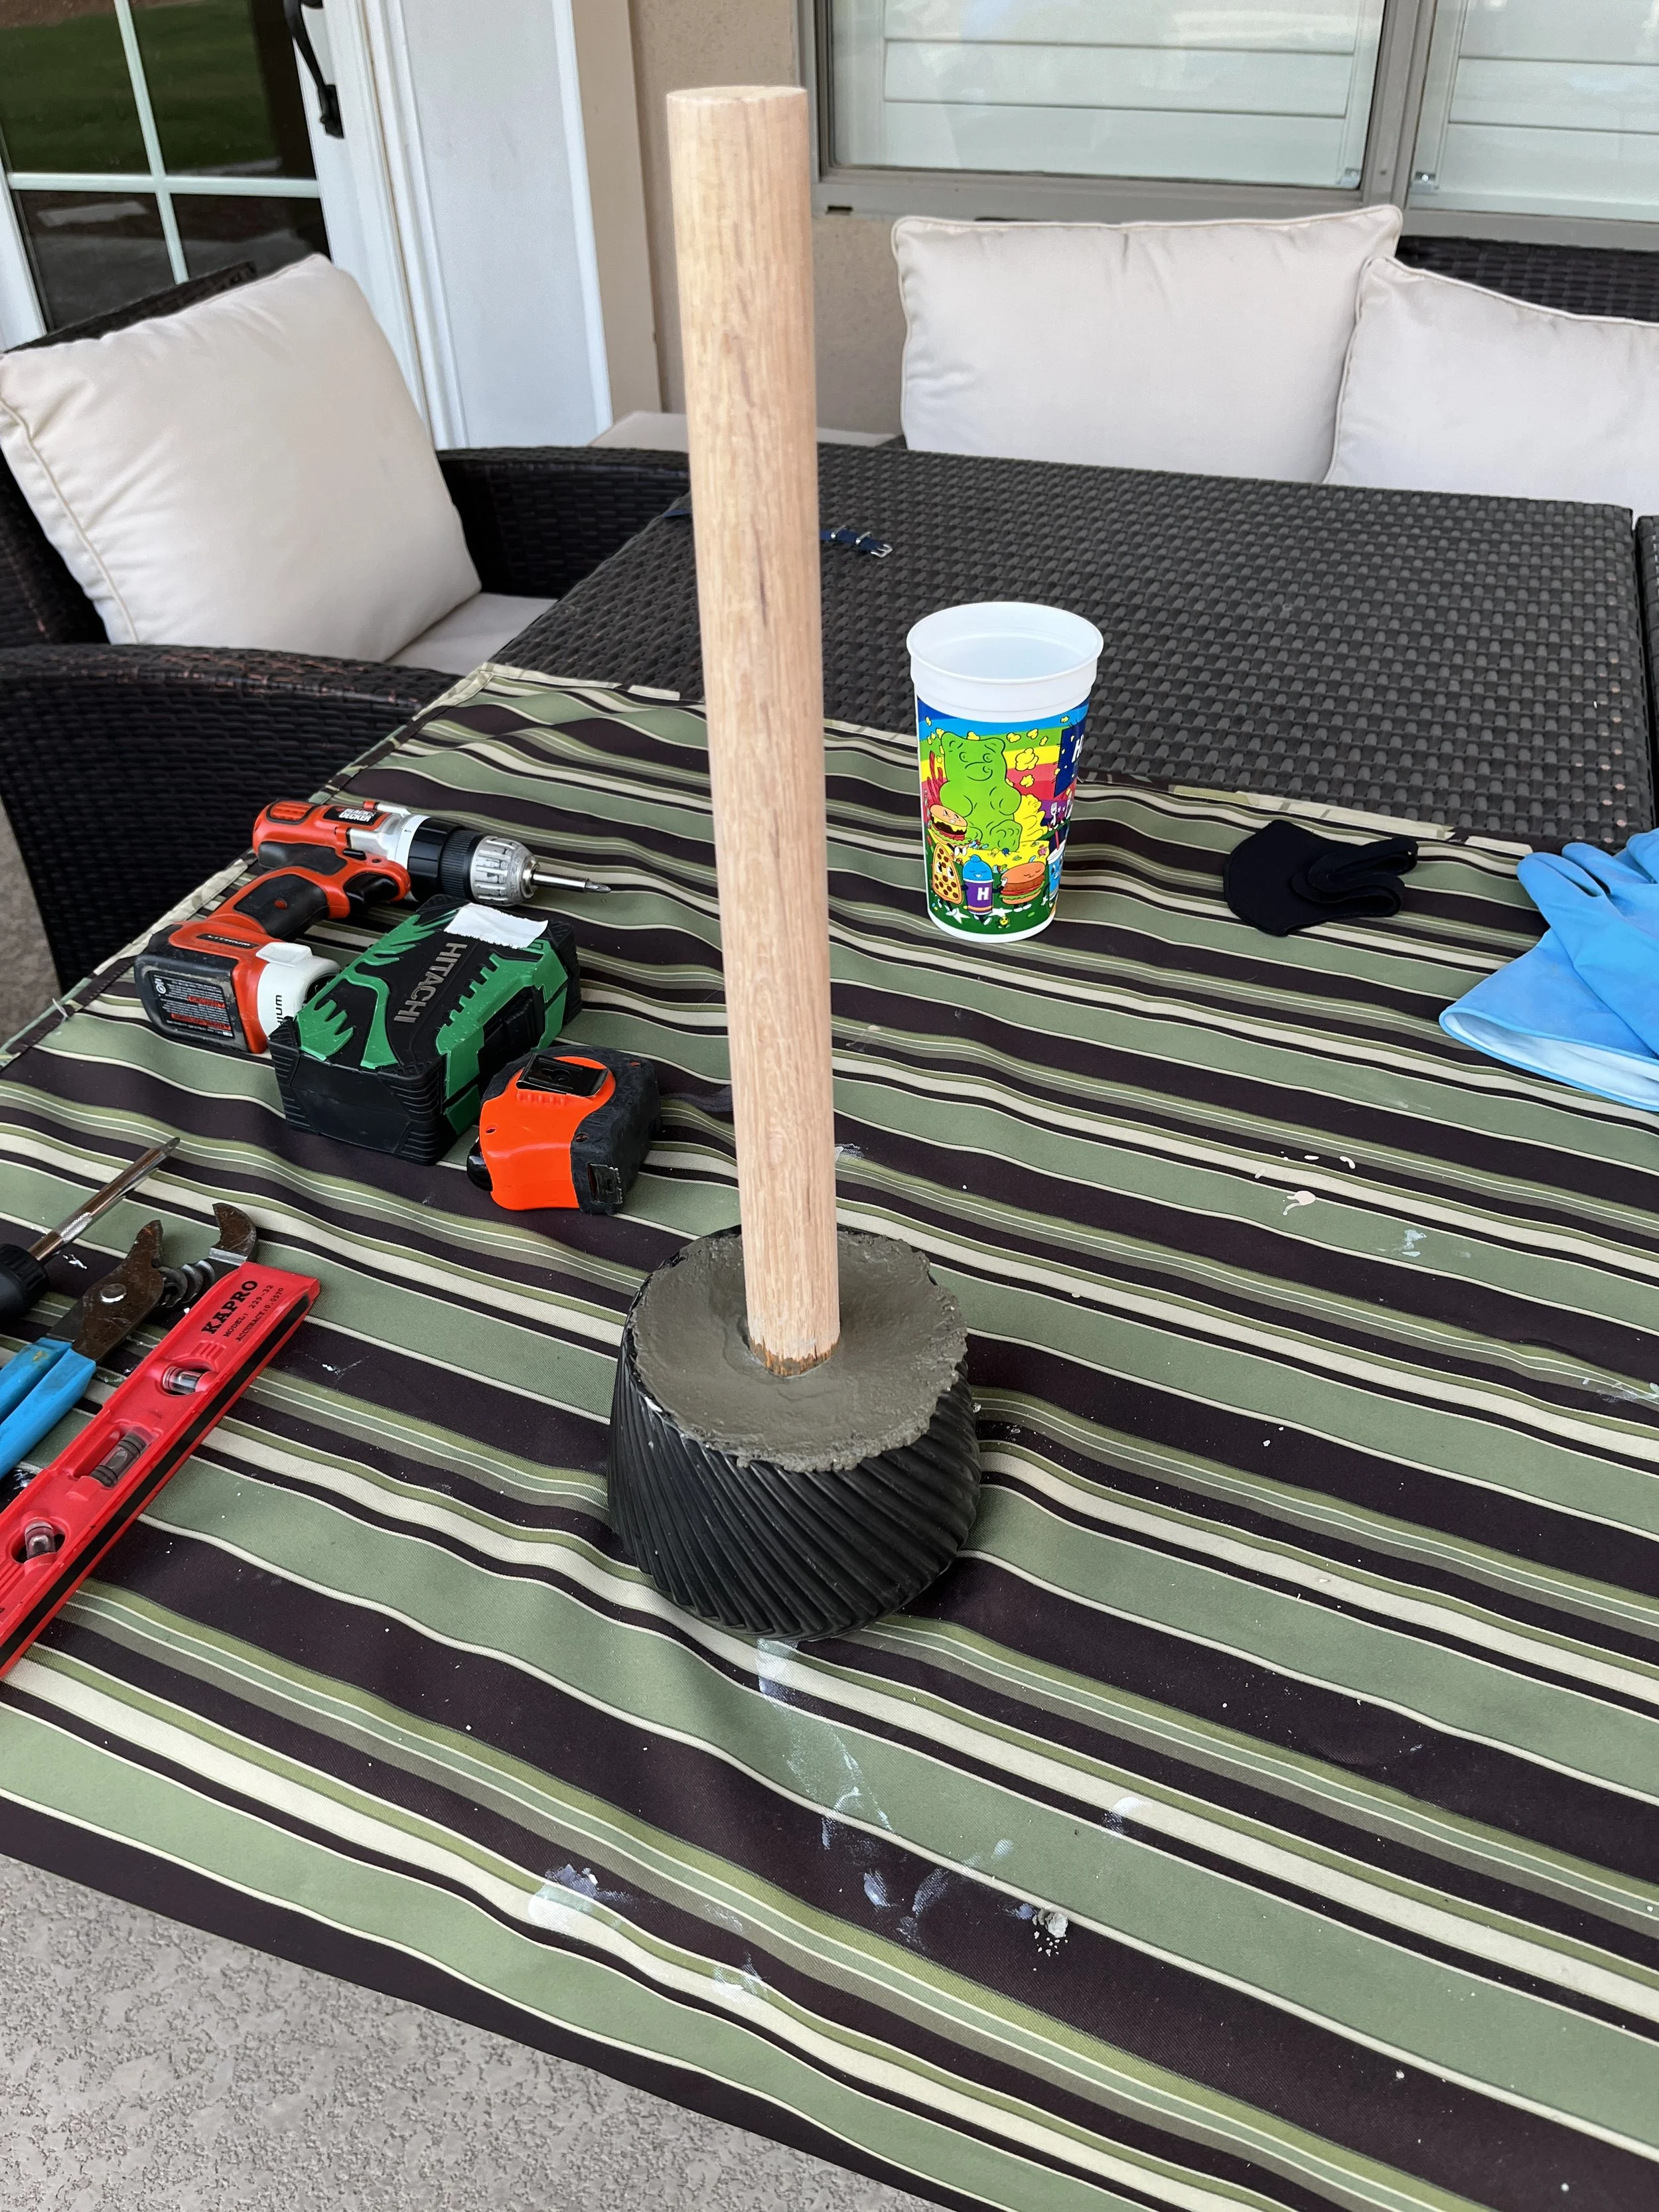
Cut a 1.25” diameter dowel down to an 18” section, then sand it really well. I also had a 1” oak dowel on hand, but went with the larger handle size for my trial run.
Drill holes and screw in 4 screws near the bottom of the dowel, to act as a reinforcer and to give the concrete more to grip onto the handle with.
Wear mask and gloves.
Scoop out enough Quickrete into a separate bucket for mixing.
Add water - a little at a time - and mix/stir until you get a concrete-ey texture.
Scoop the concrete into the planter/mold until it is about half full. (or half empty if you’re a cynic.) Use little scoops, and continue to smooth it out as you go to remove any air bubbles.
Insert the club handle into the planter/mold. It should be able to stand up pretty well at this point. It doesn’t need to be perfectly vertical yet.
Finish filling the planter/mold with concrete around the handle, smoothing out the air pockets along the way.
Once the mold is full, make sure the handle is vertical. It doesn’t have to be perfect, but the closer the better. Too much lean and the club will feel unbalanced when you swing it.
Let the concrete dry/cure for 24 hours.
Crack the mold with a hammer and carefully remove the ceramic pieces.
Give your new club a swing, and smile.


Overall I’m very happy with the results (and the process), but it wasn’t perfect.
What went well?
After 2.5 years of swinging steel clubs and maces, I cannot believe how good the wood handle feels to swing. I will definitely make more of these.
First time through the process and it still came out pretty good. There are things I can do better next time, but this one is perfectly usable.
It’s a satisfying feeling to build something that you’ll actually like to use.
What can I do better?
It’s too light. I had to eyeball the planter/mold at Walmart and guestimate how heavy the final product would weigh. My goal was to make 2 identical 8-lb clubs. This one weighs in at 5 lbs. Now I know that a 32-oz (liquid) planter will make a 5-lb club/mace; next time I will use a 50-55 oz mold.
The handle settled while the concrete dried and is not perfectly vertical. I got lucky because it is only slightly off and still swings great, but next time I will support it so it doesn’t lean at all.
There are a few visible air pockets around the sides. Next time I will do more tapping, patting, and smoothing to remove more of the air from the concrete mixture.
Conclusion
I’m not one of those people saying there’s some kind of spiritual connection with your body and your equipment when you make your own clubs. But there is something cool about making your own badass piece of fitness-maker.
I am also 100% on the side of wood handles over steel handles, although I haven’t reconciled the idea yet that heavier clubs will require really big concrete molds (which I’m not sure I love.)
And the price can’t be beat. If the weight was right and I went ahead and made the 2nd (twin) club, the total cost would have been $14. Compare that with a pair of steel cubs on one of the big retailer’s website for $45 plus shipping.
All that being said, the majority of my equipment will remain iron and steel - either store bought or custom made.
There isn’t a right or wrong answer here. But if you have an itch you want to scratch - go for it! It’s not hard to do and the results are pretty cool.
- Chris Butterworth